Welcome! Thanks for trying out appleseed.
In this guide, you’ll learn how to:
And we’ll wrap up with some closing notes.
Let’s get started.
If you haven’t done so already, head to the Download page and download the current version of appleseed for your platform.
If a build for your platform does not appear to be available, it might be that we didn’t have a chance to make it yet. In that case, feel free to drop us a line in the forum and we’ll try to make a build shortly.
Builds come as plain zip files. Installing appleseed is reduced to simply unzipping the
archive somewhere on your computer. From now on we’ll refer to the place you installed
appleseed in as appleseed.
appleseed.studio is a graphical environment which allows creating, inspecting, tweaking, debugging and rendering scenes. Technically, appleseed is only the renderer, it has no user interface. However, appleseed.studio is the central tool (and the “face”) of appleseed and it is not uncommon to refer to it as “appleseed”.
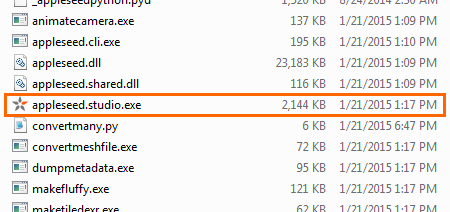
To start appleseed.studio on Windows, open the appleseed\bin directory and double-click
on appleseed.studio.exe:
As the time of writing, on Linux and OS X, you will need to open a terminal, navigate to
the appleseed/bin directory and type:
./appleseed.studio
to start appleseed.studio. (We plan to make a real OS X application at some point.)
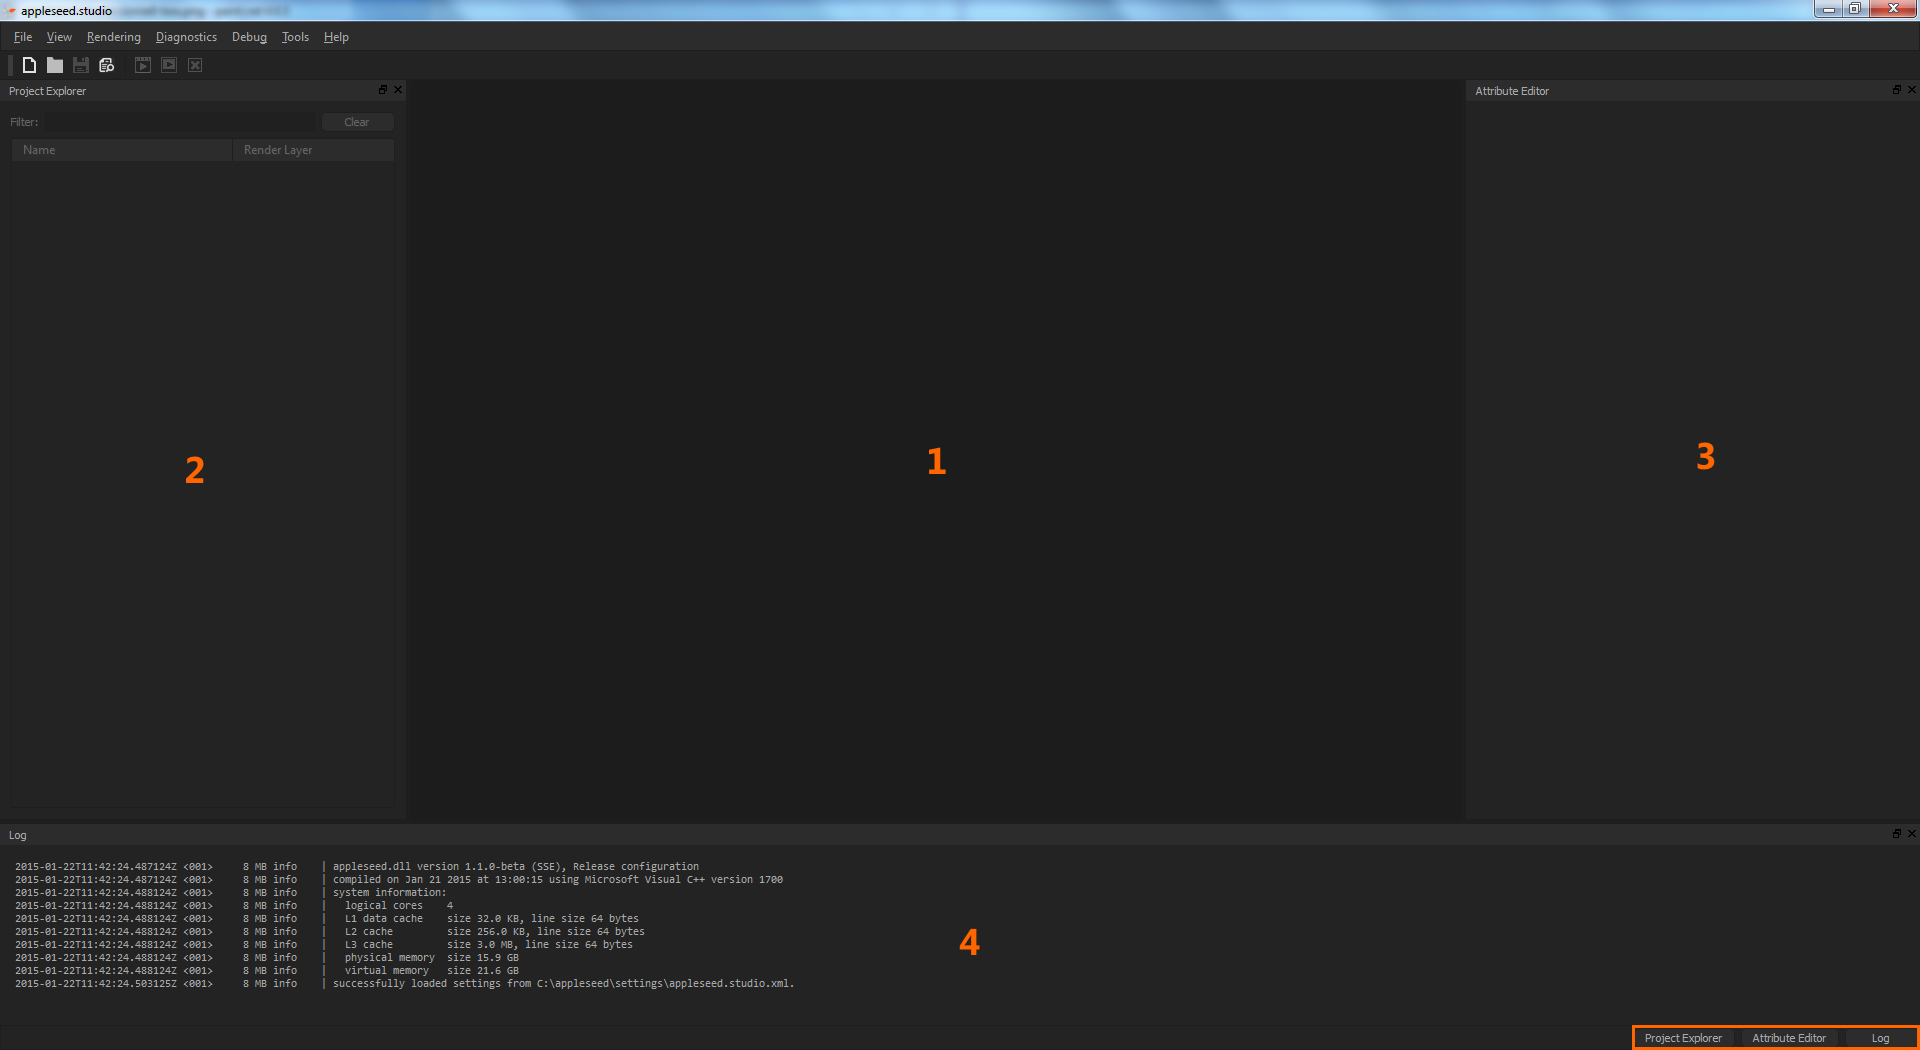
A window like the one shown above should appear.
appleseed.studio’s main window is divided in four sections:
The panels can be individually docked and undocked. They can also be hidden using the buttons at the right-bottom corner of the window.
Finally, pressing F11 will hide all panels. Pressing F11 again will restore them.
appleseed.studio will remember the state of the user interface when you quit and restore it next time you open appleseed.studio.
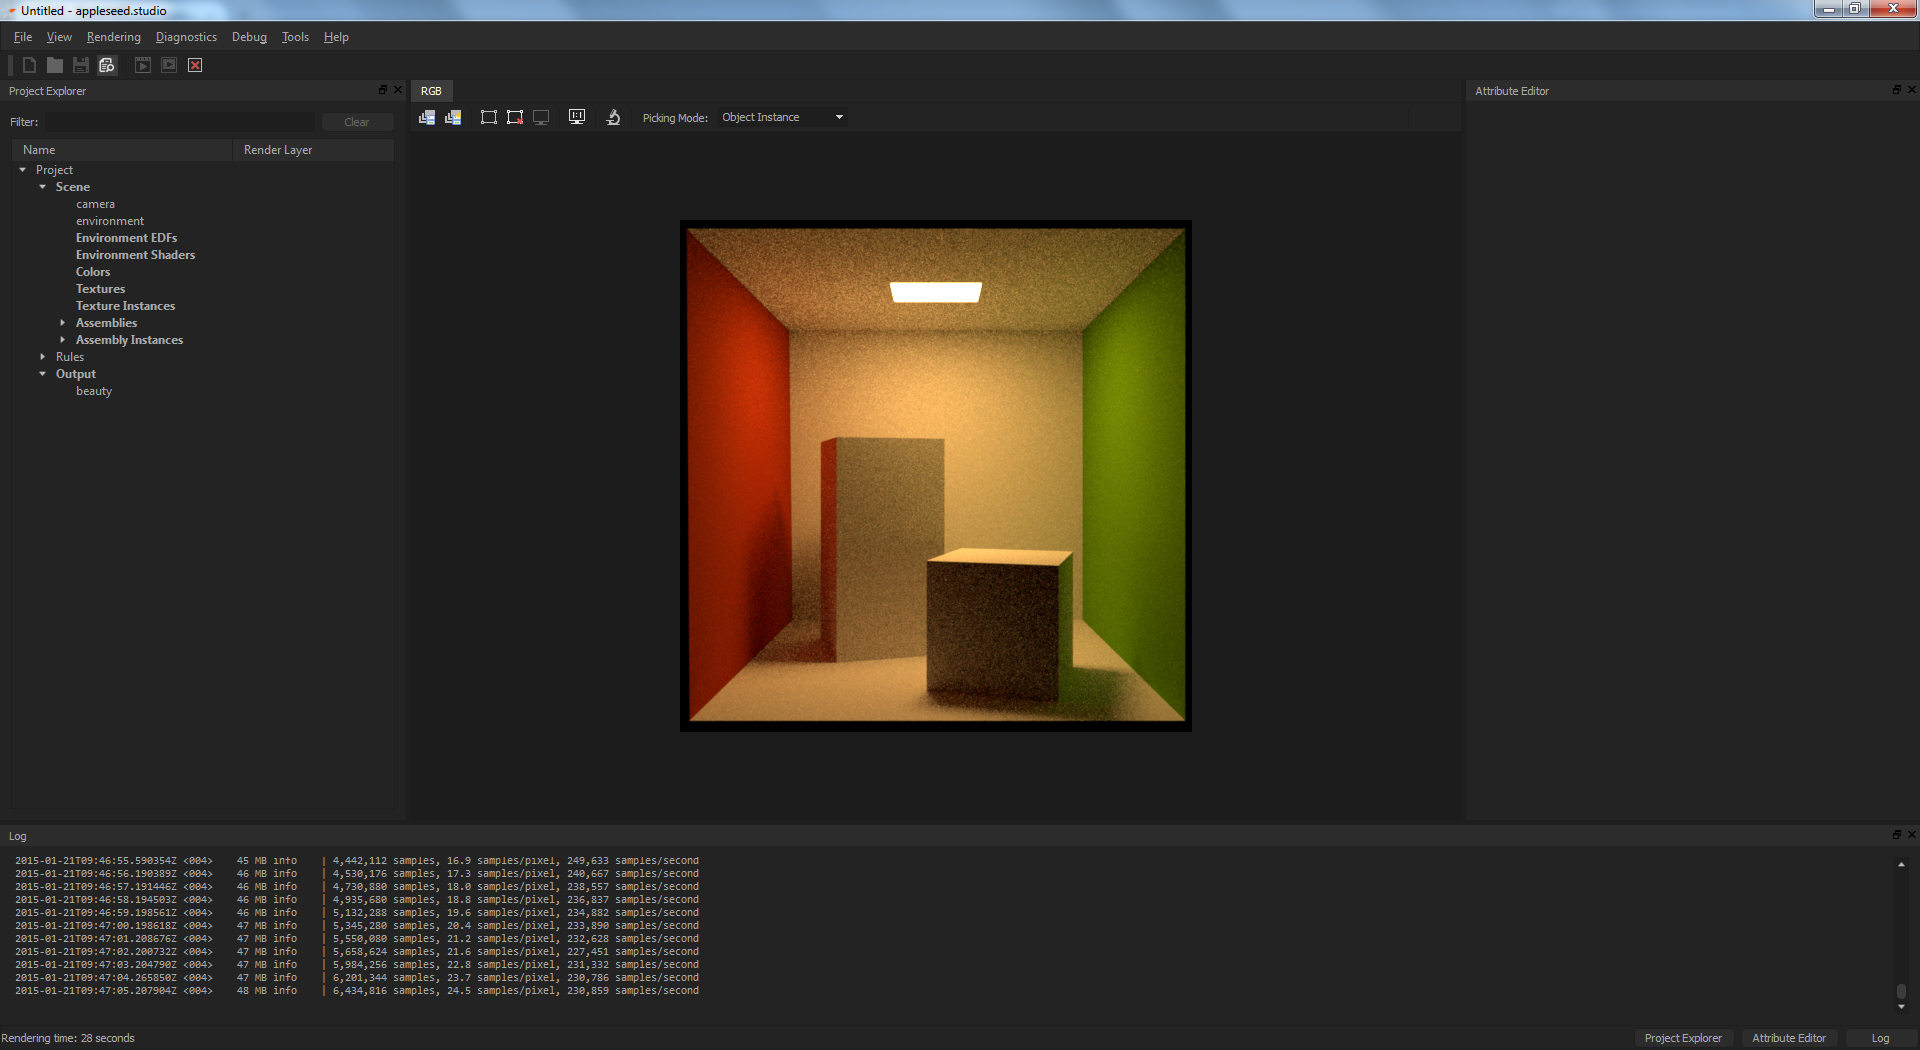
appleseed comes with a built-in Cornell Box scene that’s perfect for illustrating the basics of appleseed.studio’s user interface. Load this scene by going to the File › Open Built-in Project menu and selecting Cornell Box. A black square appears in the middle of the render area. We call this the Render Widget.
Let’s start rendering: go to the Rendering menu and select Start Interactive Rendering, or simply press F5.
At first, the Cornell Box image is noisy, but the longer you let it render, the smoother it will become. By default, interactive rendering will continue refining the image indefinitely.
You can stop rendering by selecting Stop Rendering in the Rendering menu, or by pressing Shift-F5.
Interactive rendering must be running in order to navigate in the scene. Press F5 to start interactive rendering.
Let’s now change the view point. The controls are as follow:
Until now, we’ve only used interactive rendering. This rendering mode is suited for quick preview, scene navigation and materials / lights tweaking, however it is suboptimal when it comes to producing the final image of your scene. That’s the role of the Final rendering mode.
You can start final rendering of your scene by going to the Rendering menu and selecting Start Final Rendering, or by pressing F6. Like for interactive rendering, you can interrupt rendering at any point by pressing Shift-F5.
As you can notice, rendering proceeds in tiles. By default there are as many tiles being rendered simultaneously as you have logical CPU cores in your machine.
Depending on the render settings, the renderer will do a single pass over the entire image, or will progressively refine the image by doing multiple passes (but still using tiles, unlike in interactive rendering).
Rendering must be stopped before render settings can be changed. If you haven’t done so yet, stop rendering by pressing Shift-F5.
Open the Render Settings dialog by pressing F7.
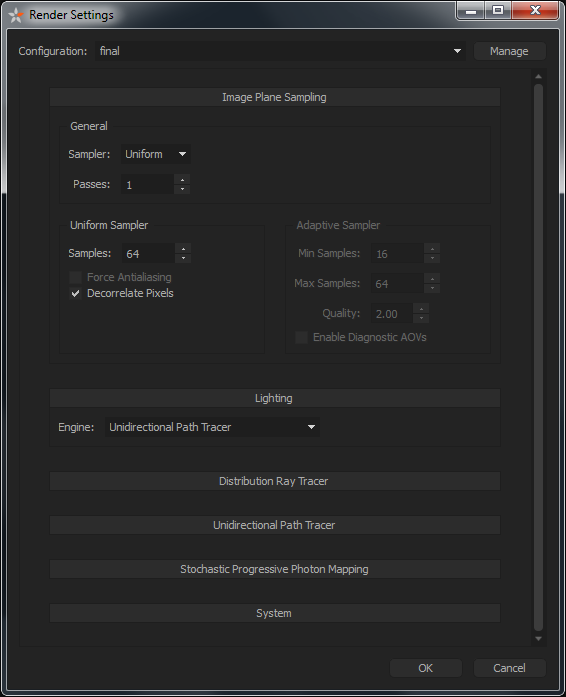
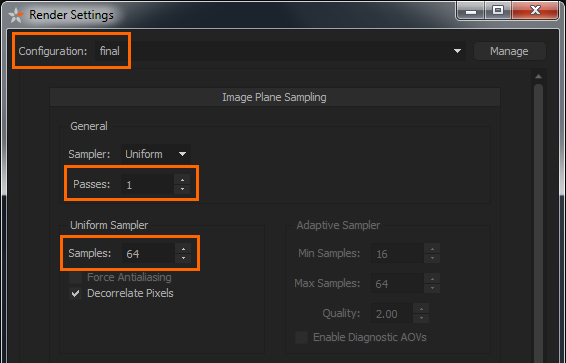
Note the Configuration dropdown list at the top: it allows to select which configuration (Final, for the final rendering mode, or Interactive, for the interactive rendering mode) to change the settings for.
Let’s change the final render settings: make sure the Final configuration is selected, as in the picture above.
One of the drawback of the final rendering mode, as it is configured by default, is that you may need to wait a long time before being sure the result as a whole matches your expectations.
While you should generally make sure that everything looks good before starting a potentially lengthly final render of your scene, there is a middle ground mode that may be of interest: multipass final rendering. In this mode, the renderer will do multiple final render passes over the image, with each pass reducing the amount of noise. The benefit of this approach is to combine the efficiency of the final rendering mode with some form of progressivity.
Let’s increase the number of passes (set to 1 by default) to 8. Let’s also decrease the number of samples added by each pass from 64 to 8:
Press OK to apply the changes and press F6 to start a new final render.
With 8 passes, each adding 8 samples to every pixels, the total number of samples will be equal but you will have an overview of the final result in 1/8th of the time.
That’s it for this short introduction to appleseed. We barely scratched the surface of appleseed.studio functionalities, and we didn’t cover the other tools of the appleseed distribution, notably the command line renderer. Check out the tutorials to start discovering and learning the deep set of functionalities offered by appleseed.
Our Discord server or the user forum are the best places for most questions and inquiries.
You can also contact us privately at [email protected] but you may not get an answer as quickly as on Discord or via the forum.
The appleseed logo  was designed by Paolo Berto (@pberto)
Site and software released under the MIT license - Assets released under CC BY-SA 4.0
This site does not track you!
© 2010-2020 The appleseedhq Organization